


Chevrolet Corvette Touch Up Paint (596 OEM Colors)

Search for your Corvette's color
-

Autumn Red
ChevroletCOLOR CODE80
(1981) - Autumn Red 🔥 1 sold recently -

Corvette Orange Poly
ChevroletCOLOR CODE80-
980 (1974) - Corvette Orange Poly 🔥 1 sold recently -

Corvette Dark Blue Metallic
ChevroletCOLOR CODE83
(1979) - Corvette Dark Blue Metallic 🔥 1 sold recently -

Red
ChevroletCOLOR CODE83
(1980) - Red 🔥 1 sold recently -

Atomic Orange
ChevroletCOLOR CODE83U/
WA418P - Atomic Orange 🔥 1 sold recently -

Bluestream Metallic Tricoat
ChevroletCOLOR CODE85/
WA512Q - Bluestream Metallic Tricoat 🔥 1 sold recently -

Medium Spiral Gray Metallic
ChevroletCOLOR CODE88/
WA812K - Medium Spiral Gray Metallic 🔥 1 sold recently -

Corvette Hilton Brown Metallic
ChevroletCOLOR CODE89
(1978) - Corvette Hilton Brown Metallic 🔥 1 sold recently -

Crystal Claret Tricoat
ChevroletCOLOR CODE89/
WA505Q - Crystal Claret Tricoat 🔥 1 sold recently -
Crystal Claret Tricoat
ChevroletCOLOR CODE89/
WA505Q/ GBE - Crystal Claret Tricoat 🔥 1 sold recently -

War Bonnet Yellow Poly
ChevroletCOLOR CODE91-
989 (1972) - War Bonnet Yellow Poly 🔥 1 sold recently -

Medium Dark Pewter (Interior Color)
ChevroletCOLOR CODE92/
WA110D - Medium Dark Pewter (Interior Color) 🔥 1 sold recently -

Ontario Orange Firemist Poly
ChevroletCOLOR CODE97-
987 (1972) - Ontario Orange Firemist Poly 🔥 1 sold recently -

Steel Cities Gray Firemist Poly
ChevroletCOLOR CODE98/
988 (1971) - Steel Cities Gray Firemist Poly 🔥 1 sold recently -

Frost Blue Metallic
ChevroletCOLOR CODE502A/
513B (1959) - Frost Blue Metallic 🔥 1 sold recently -

Snowcrest White
ChevroletCOLOR CODE510A/
515B (1959) - Snowcrest White 🔥 1 sold recently
Find Your Chevrolet Corvette Paint Code
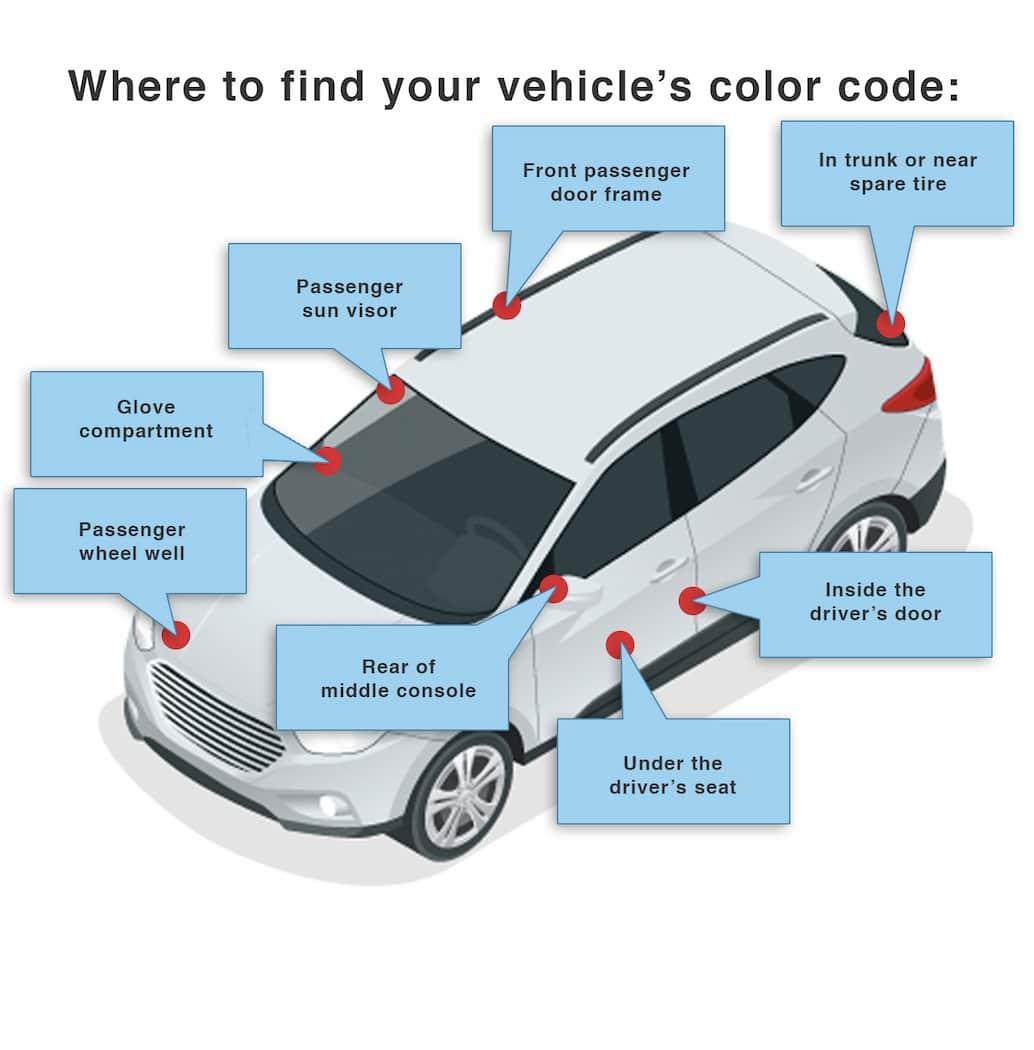
Chevrolet did not make it easy to find the color code. Over the years they used many different locations and did not standardize the color plate, so it can be hard to locate. Usually it is in the glove box or the spare tire well; otherwise, the search may extend everywhere. The typical code is 51/WA316N, usually preceded by BC/CC. Two tone codes can appear as BC/CC U316N or BC/CC L316N (U for Upper, L for Lower).
Chevrolet Corvette Paint Info
Chevrolet Corvette Colors by Year
Let us know the year your Corvette was manufactured. We'll eliminate colors that won't match your vehicle.
- 2027 (12 colors)
- 2026 (12 colors)
- 2025 (19 colors)
- 2024 (17 colors)
- 2023 (17 colors)
- 2022 (22 colors)
- 2021 (23 colors)
- 2020 (20 colors)
- 2019 (36 colors)
- 2018 (44 colors)
- 2017 (43 colors)
- 2016 (32 colors)
- 2015 (27 colors)
- 2014 (24 colors)
- 2013 (26 colors)
- 2012 (27 colors)
- 2011 (29 colors)
- 2010 (26 colors)
- 2009 (25 colors)
- 2008 (21 colors)
- 2007 (31 colors)
- 2006 (11 colors)
- 2005 (12 colors)
- 2004 (11 colors)
- 2003 (21 colors)
- 2002 (14 colors)
- 2001 (11 colors)
- 2000 (16 colors)
- 1999 (12 colors)
- 1998 (14 colors)
- 1997 (8 colors)
- 1996 (12 colors)
- 1995 (15 colors)
- 1994 (14 colors)
- 1993 (15 colors)
- 1992 (15 colors)
- 1991 (14 colors)
- 1990 (12 colors)
- 1989 (11 colors)
- 1988 (13 colors)
- 1987 (12 colors)
- 1986 (11 colors)
- 1985 (10 colors)
- 1984 (13 colors)
- 1983 (9 colors)
- 1982 (14 colors)
- 1981 (15 colors)
- 1980 (9 colors)
- 1979 (11 colors)
- 1978 (13 colors)
- 1977 (11 colors)
- 1976 (9 colors)
- 1975 (13 colors)
- 1974 (11 colors)
- 1973 (12 colors)
- 1972 (10 colors)
- 1971 (11 colors)
- 1970 (11 colors)
- 1969 (10 colors)
- 1968 (10 colors)
- 1967 (10 colors)
- 1966 (27 colors)
- 1965 (21 colors)
- 1964 (6 colors)
- 1963 (18 colors)
- 1961 (15 colors)
- 1960 (13 colors)
- 1959 (18 colors)
- 1958 (20 colors)